ShopDreamUp AI ArtDreamUp
Deviation Actions


Suggested Deviants


Suggested Collections


You Might Like…


Featured in Groups


Description
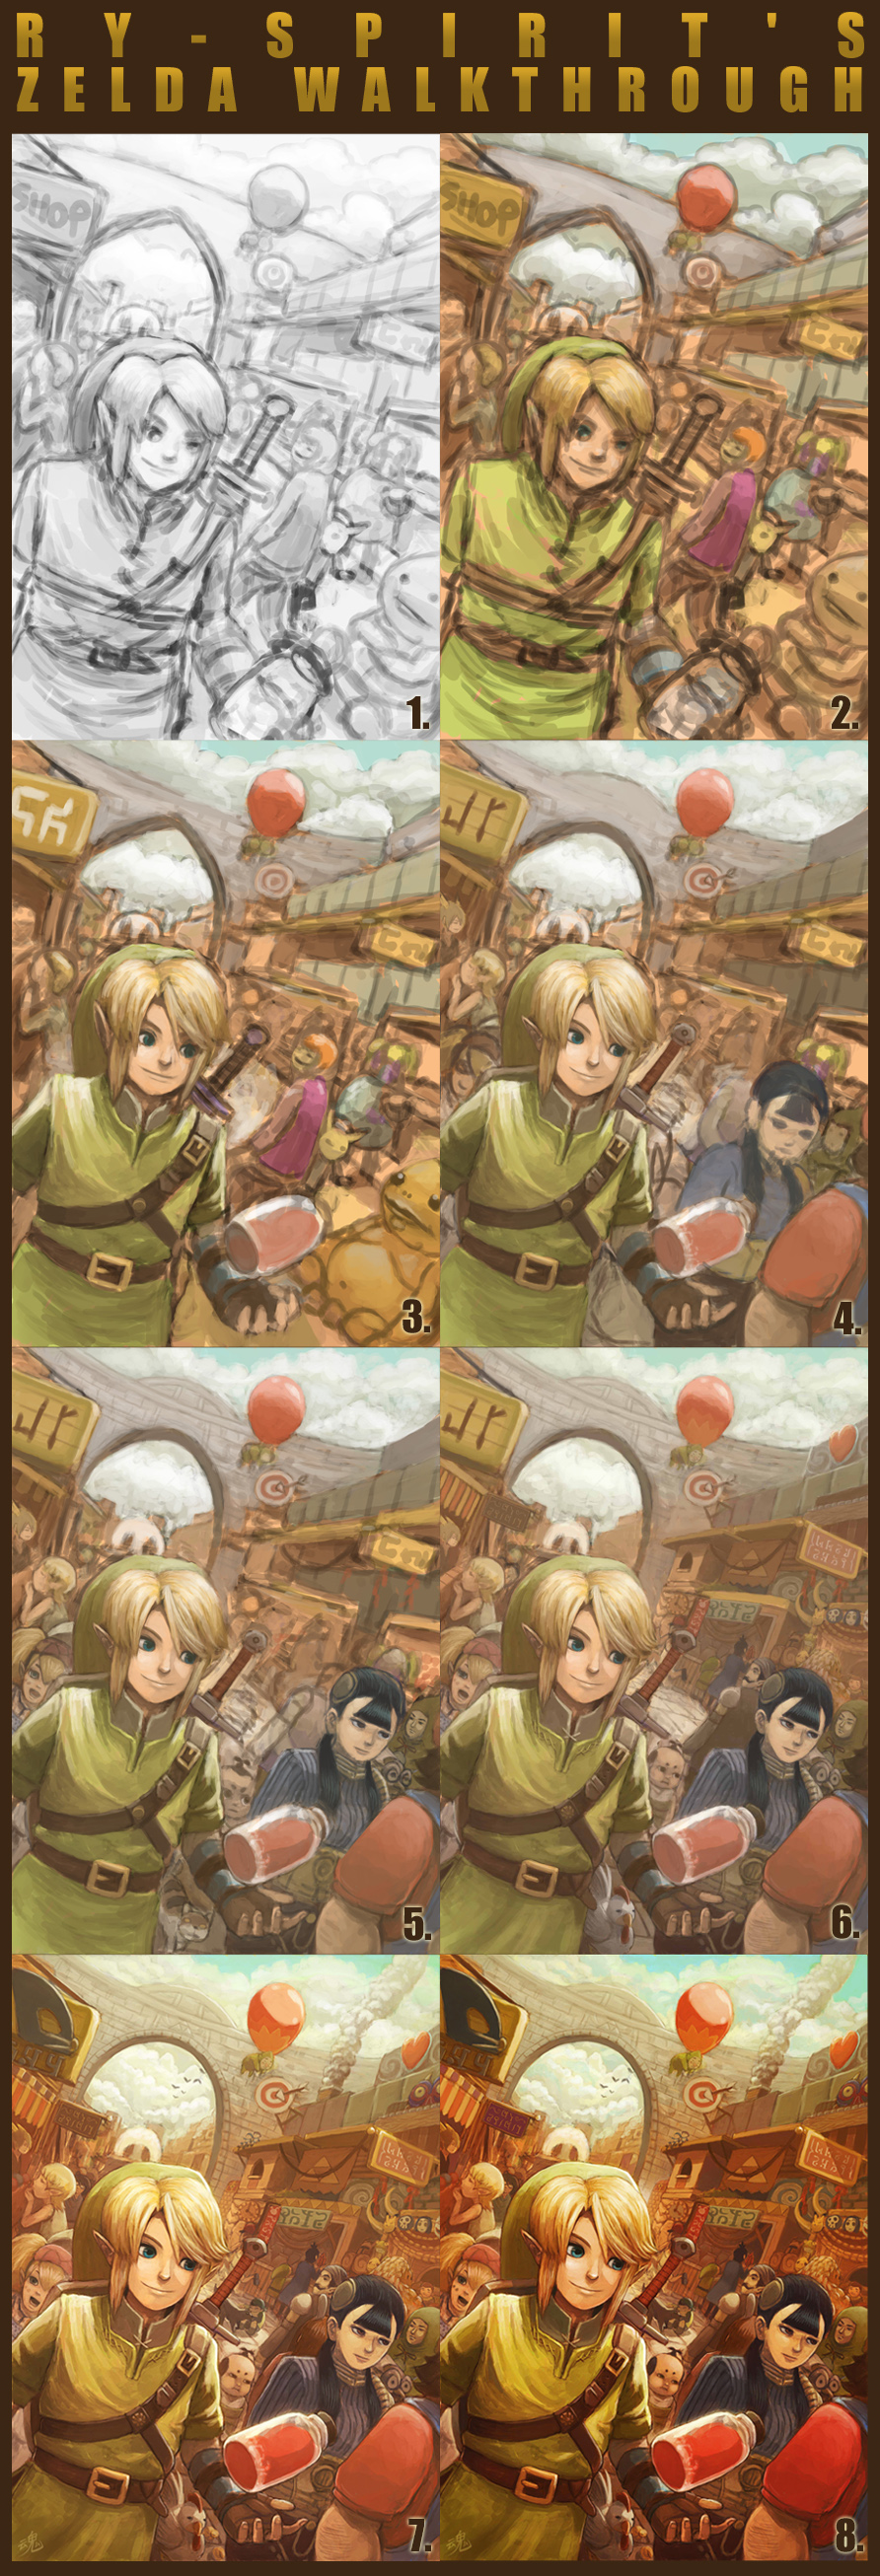
A walkthrough of how I did 'The City of Hyrule' [link] This is not a step by step tutorial as I have changed many things throughout the whole progress.. but it is still something worth looking at I guess, so please enjoy this walkthrough and perhaps learn something from it. This is just how I do my artworks, there are many ways to do it, please explore it yourself and find what suits you best.
WALKTHROUGH
1. With the help of Photoshop and a Wacom tablet. I started off with a pretty rough sketch, VERY rough, I didn't even bother with details at this stage, mainly due to the fact that I know I would be changing the characters and moving things around later. But this gave me an idea of how I wanted the final design to look like.
2. Colors were then added, I usually start a new layer and turn the blending mode to multiply before coloring. This would allow me to see the lines from behind after the colors were added on. Again this is rough, its to give me a general idea of how I wanted the colors to look, I especially loved the brown/orange tint over the image, it makes the atmosphere very warm and happy, but thats a personal thing.
3. More details are added, I have redrew the bottle from Link's hand to make it float in mid air, I have changed the sign's english words into Hylian. I have colored the Goron and most importantly gave as much detail to Link as possible, because he is up the front and the first thing the audience would probably look at when they look at this picture.
4. Changed the characters around here.. I thought the Goron was a little odd just sitting in the middle of the road, I also thought the Happy Mask Salesman shouldn't be in the middle of the street as he wasn't really part of the Twilight Princess game, so I replaced him with Aishei who was in Twilight Princess. I also decided to add Mario in (Not Talon.) just walking off the picture for fun. Oh I also added myself in the pic.
5. More characters were added, Like Malo the strange looking kid as well as that Tingle looking guy from the Star Games. You can also see a random cat next to Link.
6. I killed the random cat! and replaced it with a Cucco. I then started to fix the details on the shops and such, adding details on the shops were the most annoying part of the whole artwork... Especially the masks.. but yes as you can see the Happy Mask Salesman is back, but this time more subtle in the shop.
7. Gave the overall artwork another bucket of orange to make the artwork warmer and more lively. All of the details are already done in this step as you can probably tell. And I usually end with my logo on the bottom somewhere, the asian character for 'Spirit'
8. I then began twitching the colors a bit more and fixed up people's face's etc... very subtle changes in this stage. Oh yes I also added a bit of white glow behind Link to make him sparkle a little bit. And thats the end.
All done with Photoshop CS5.
Artwork done by
Characters and design by Nintendo.
Image size
892x2612px 1.15 MB
Comments184
Join the community to add your comment. Already a deviant? Log In
Is that toon Link in the background?